Showing posts with label temporary design. Show all posts
Showing posts with label temporary design. Show all posts
Tuesday, November 29, 2016
No room for a tree!
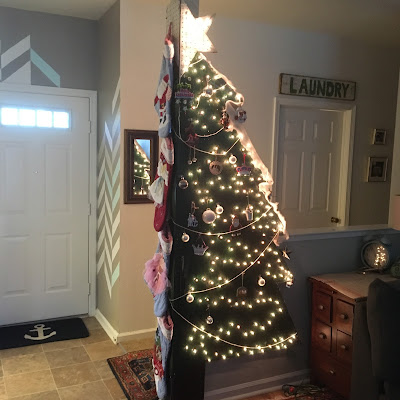
Are you left wondering where a Christmas tree is going to fit in your small space? Today I have an answer for you! Check out my Pegboard Christmas Tree! This idea came to me when I was checking out Natalme on how to paint pegboard. The combination of her tutorial and my desperate need to find a way to deck the halls led me to create this Christmas miracle!
And on the other side of the wall...
If you are low on space but have the holiday cheer let me show you how to create something unique this season!
Step One: The most important thing to do is have yourself a handyman on call AKA your Dad who is visiting! They need projects folks! I just want to help an old man out with feeling useful on vacation! Yes, I am a good daughter, thank you!
Step Two: Go to your local hardware store and purchase two sheets of 8ft x 5ft (I think that is the width) pegboard. If you have a weird wall like myself, you will need to either A: have it be flat from top to bottom or B: buy what I like to call, bumper blocks. These will bump out the wall in order for you to screw the pegboard in and have it look nice.
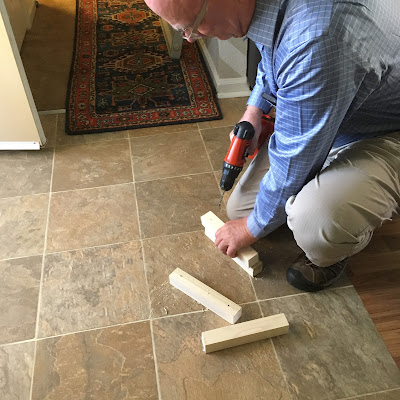
Here is the old man with the bumber blocks. Ours were 1 1/2 in X 4 in. We screwed these into the support wall, three on each side staggered. You will screw the cut boards into the blocks to secure it.
Step Three: You will need to draw out how you want your tree trimmed/cut! I included my star at the top so it was one solid piece. I used the full length of the board 8ft. She is a big one! After you have your tree drawn out, ask your board visitor (Dad) to help cut it out. If he is old you may need to mark in white the stopping points so he doesn't hack your tree to pieces! You can see where I marked the edges.
Step Four: After you repeat step three on your second board and cut out, you are ready to prime. I slapped a little primer down in-between testing out a Costco Pumpkin Pie...it was the right thing to do!
Repeat for each side that will show...and for the testing of pumpkin pie.
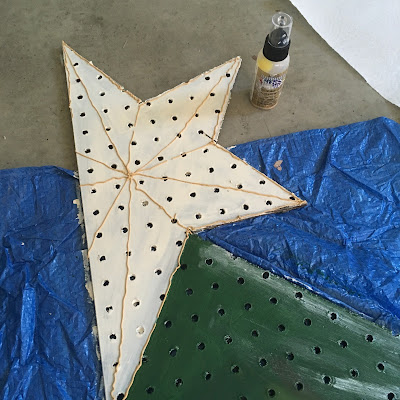
Step Five: Bust out your Decoart Maxx Gloss Chile Poblano paint. It is really a fabulous color! Lay down a coat and make sure you have a tarp underneath. Darn paint will drip down the holes and get everywhere. Yes, I read Natalme but I am to lazy and cheap to go buy the awesome spray painter she said to use. So cheap and lazy use a tarp, smart and on the ball follow Natalme instructions on spray painting!
Step Six: Paint your star white then put a little glitz and glam with Decoart Metallic Pearl on it. I tried out Decoart 3D Opaue Gloss Enamels in Glorious Gold to give the star an outline. As you can see my lines are not the straightest but I don't have the strongest of hands to squeeze the small bottle, so I was shaking...I need to go do some hand exercises!
Finally: you just need to find some lights, stick them in the hole and boom, boom, boom, you are done! I tried to fill the star in the most then draped the lights down the front. All in all I used four strands of 100 lights. I did have to widen the holes a little with a drill to get the base of the light to stay in.
OH DANG! Forgot to say that I cut a 8ft X 7 1/4in strip from the leftovers on one of the boards. This is to cover the end of the wall and to create a great place to hang your stockings! I used Command Hooks to hang the stockings. The hooks just for pegboards sick out to much. I also used the small clear Command Hooks to hang the ornaments.
Happy Holidays!
XOXO
Subscribe to:
Posts (Atom)


